Using the EA add-in
The add-in must be set up: it must know who you are and what settings you prefer by default.
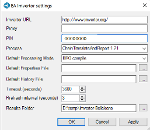
Within EA, go to Extensions > EA Imvertor > Settings:

This screenshot shows the settings for BRO. (Only) when you specify your PIN code (password) completely, the available options are shown. The system will know you and your company and the settings that are applicable.
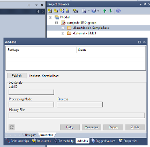
Next, you can start working on a model. Once you access a model package that has the tagged value "Imvertor" set to "model", the add-in will understand that this is a known model package, and show the Imvertor add-in screen.

When you hit Publish, some additional last minute settings may be entered, and the model will be compiled and sent to the server.
Most notably, you can pass a particular properties file which streamlines the model process to your specific needs. The contents of any properties file is technical and should be set up by your system administrator. Normally you do not need to pass any additional information and can just hit "okay".
You can monitor the process looking at the status column.

Finally, results are made available by some buttons.
These are:
-
Retry, try the selected job again, using the same settings.
-
Messages, fetch all errors and warnings. When these are displayed, you can access the point where the problem occurred by hitting Ctrl-G on the selected message.
-
Report, load the Imvertor report in your default browser. This reports is tailored to suit the more technical or functional needs as determined for your company.
-
Zipfile, holding all generated specifications, including documentation, XSD schemas, office documentation and the like; this depends on the settings applicable for your company.
